
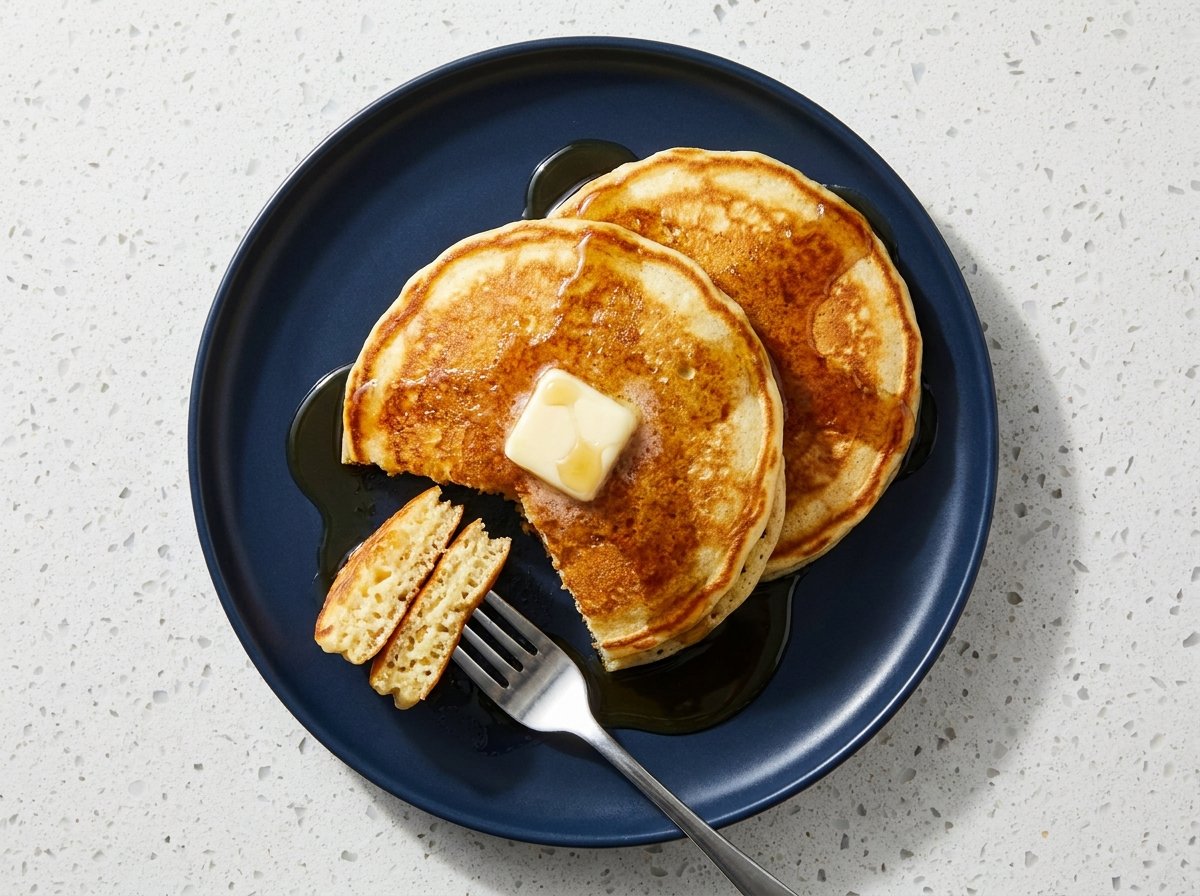
Fluffy Pancakes are the ultimate breakfast comfort food, loved by kids and adults alike for their cloud-like interior and crisp golden edges. Nothing beats slicing into a stack of homemade flapjacks dripping with warm butter and real maple syrup on a Sunday morning. Forget those pre-packaged boxed mixes filled with artificial preservatives and dull flavors. Making Fluffy Pancakes from scratch is ridiculously easy, costs next to nothing, and relies on simple kitchen science that you can master in under ten minutes. Once you understand how basic acid-base reactions work in your batter, you will never buy a box of mix again.
The Story & Flavor Profile: From Ancient Griddle Cakes to Breakfast Royalty
A Quick History of the Breakfast Staple
Pancakes have been filling bellies for thousands of years. Ancient Greeks baked flat cakes called tagenias on hot clay griddles using basic wheat flour, olive oil, honey, and curdled milk. Renaissance cooks flipped thin batters flavored with spices, sherry, and rosewater. Early American settlers relied heavily on buckwheat and cornmeal batters cooked over open hearth fires.
As modern baking powders hit grocery shelves in the mid-nineteenth century, everything changed. Cooks no longer needed complex yeast starters to get a rise out of their morning griddle cakes. The dense, flat griddle cake evolved into the airy breakfast stack we adore today. Diner culture in mid-century America sealed the deal, cementing tall stacks topped with melting butter patties into breakfast history.
What Makes a Pancake Truly Unforgettable?
A great pancake isn’t just sweet bread cooked on a hot pan. It is a delicate balance of contrasting textures and balanced flavors. You want a razor-thin golden exterior that offers a gentle crunch, leading directly into a pillow-soft center.
Flavor-wise, pure sweetness can get boring real fast. The best stacks carry a subtle tangy background note that cuts through heavy maple syrup. A pinch of salt keeps the batter from tasting flat, while melted butter adds a rich, nutty backdrop. Achieving signature Fluffy Pancakes comes down to creating millions of tiny air pockets that lock in steam while cooking, holding their structural integrity straight from skillet to plate.
Ingredient Science: Why This Chemistry Works Every Single Time
  +------------------+     +------------------+
  |   White Vinegar  |  +  |    Whole Milk    |
  +--------+---------+     +--------+---------+
           |                        |
           +-----------+------------+
                       |
                       v
           +-----------------------+
           | Acidic "Soured Milk"  |
           +-----------+-----------+
                       |
                       v  (Combined with Baking Soda)
           +-----------------------+
           | Carbon Dioxide Bubbles| --> Sky-High Lift!
           +-----------------------+
The Magic of Homemade Soured Milk
The base recipe calls for milk combined with white vinegar, rested for five minutes. Do not skip this step! You are essentially making a quick, low-fat homemade buttermilk replacement.
The acetic acid in the vinegar lowers the pH of the milk, causing the milk proteins (casein) to begin unwinding and curdling slightly. When this acidic liquid hits your dry ingredients, it triggers an immediate chemical reaction with the baking soda. That reaction produces micro-bubbles of carbon dioxide gas throughout your batter. As heat strikes the griddle, those trapped gas bubbles expand rapidly, working alongside steam to give these Fluffy Pancakes their soft lift.
| Acid Option | Acid Power (pH level) | Flavor Impact | Best Used For |
| White Vinegar | High (~2.5) | Neutral, sharp rise | Clean, neutral tall stack |
| Lemon Juice | High (~2.0) | Bright, subtle citrus | Fruity or berry stacks |
| Real Buttermilk | Medium (~4.5) | Rich, tangy, complex | Traditional classic flavor |
| Plain Yogurt + Milk | Medium (~4.5) | Creamy, slightly tart | Extra moist interiors |
Flour & Gluten Control
All-purpose flour forms the backbone of your stack. It contains two key proteins: glutenin and gliadin. When water hits these proteins and you stir the bowl, they link up to form gluten—a stretchy network that provides structure.
Here is the catch: too much gluten turns breakfast into tough, rubbery shoe leather. For tender Fluffy Pancakes, gluten control is everything. You want just enough gluten to trap expanding carbon dioxide gas, but not so much that the batter becomes elastic and chewy. Gentle mixing is non-negotiable.
The Dual Leavening Powerhouses
This recipe uses a double-barreled leavening strategy: baking powder and baking soda.
- Baking Powder: Contains both an acid and a base that react when hydrated, then react again when exposed to heat. This gives your batter a steady, sustained rise.
- Baking Soda: Requires an external acid (our soured milk) to activate. It neutralizes excess acid while creating an immediate, aggressive surge of initial gas bubbles.
Together, they form the ultimate tag-team for maximum height and a feather-light interior crumb, acting as the primary key behind diner-style Fluffy Pancakes.
Fat, Sugar, and Eggs
Every single component plays a functional role beyond just adding flavor:
- Granulated Sugar: Sweetens the stack, but more importantly, it retains moisture and aids in the Maillard reaction—the chemical process that turns the surface deep golden-brown.
- Melted Butter: Coats gluten strands to keep them short and soft (hence the term shortening). It provides rich mouthfeel and crisp edges.
- Egg: The egg white provides structural support for Fluffy Pancakes so they don’t collapse as they cool. The egg yolk contributes fat, emulsifiers, and a rich yellow hue.
Substitutions, Swaps, and Dietary Tweaks
  DIETARY SWAPS AT A GLANCE:
  - Gluten-Free  --> 1:1 AP Gluten-Free Baking Flour (with Xanthan Gum)
  - Dairy-Free   --> Almond/Oat Milk + 1 tbsp Lemon Juice + Melted Coconut Oil
  - Low-Sugar    --> Monkfruit Sweetener or Erythritol (1:1 Swap)
  - Egg-Free     --> 1 tbsp Ground Flaxseed + 3 tbsp Water (Rest 5 mins)
Gluten-Free & Low-Carb Alternatives
Living without gluten doesn’t mean eating dense bricks for breakfast. You can easily make an incredible gluten-free baking mix for Fluffy Pancakes without wheat.
- 1:1 Gluten-Free Flour: Look for commercial blends containing rice flour, potato starch, and xanthan gum. Measure it by weight rather than volume, as GF flours tend to pack densely.
- Oat Flour: Blend rolled oats into a fine powder. It adds a delicious nutty flavor and high fiber, though the interior will be slightly denser.
- Almond Flour: For a low-carb alternative, substitute almond flour. Reduce the milk slightly, add an extra egg for structure, and keep the pan heat lower, as nut flours burn quickly.
Dairy-Free & Vegan Modifications
No milk or eggs in the house? You can still enjoy Fluffy Pancakes without real milk or traditional dairy products.
- Plant-Based Milks: Soy milk works exceptionally well because its high protein content mimics dairy milk when curdled with vinegar. Almond milk and oat milk work great too.
- Butter Alternatives: Melted coconut oil adds fantastic moisture with a faint hint of sweetness. Neutral vegetable oils or vegan butter blocks work seamlessly.
- Egg Replacers: Mix one tablespoon of ground flaxseed with three tablespoons of warm water. Let it sit for five minutes until gelatinous before whisking into your liquid ingredients.
Pantry Budget Hacks
Out of white vinegar? Don’t stress. Swap in an equal amount of fresh lemon juice or apple cider vinegar. If you have buttermilk in the fridge, skip the milk-vinegar step entirely and use three-quarters of a cup of real buttermilk instead.
If you are out of melted butter, canola oil or avocado oil works fine for the batter. You will lose a slight bit of rich flavor, but the texture remains remarkably light.
The Kitchen Tool Arsenal: Gear for Perfect Golden Stacks
  +-------------------------------------------------------------------+
  |                       SKILLET HEAT COMPARISON                     |
  +-----------------------+-------------------+-----------------------+
  | Cast Iron             | Non-Stick Pan     | Electric Griddle      |
  +-----------------------+-------------------+-----------------------+
  | Heavy heat retention  | Slick surface     | Massive cooking space |
  | Darker, crisp crust   | Pale, even golden | Precise temp control  |
  | Slow heat adjustment  | Easy cleanup      | Takes storage space   |
  +-----------------------+-------------------+-----------------------+
Cast Iron vs. Non-Stick vs. Electric Griddles
Your choice of pan changes how heat transfers to your batter. Cooking Fluffy Pancakes requires stable heat distribution across the entire surface.
- Cast Iron Skillet: Holds onto heat like a champ. It creates those legendary dark-golden, crispy edges. However, cast iron develops hot spots if you don’t preheat it patiently over medium-low heat for at least ten minutes.
- Non-Stick Frying Pan: Super forgiving for beginners. Requires minimal oil or cooking spray. Produces an evenly colored, smooth surface, though you won’t get as much edge crispness.
- Electric Griddle: The absolute gold standard for feeding a family. Maintains a steady temperature (set it to 350°F / 175°C) and cooks six to eight pancakes simultaneously so everyone eats together.
Essential Accessories
Ditch the random soup spoon. Gather these essential tools for Fluffy Pancakes before mixing:
- Balloon Whisk: Ideal for aerating dry ingredients and breaking up large flour pockets without overworking the gluten.
- Wide Flexible Spatula: Offset silicone or thin metal spatulas slide effortlessly under delicate batter without tearing edges.
- Portion Scoop or Measuring Cup: A quarter-cup spring-loaded ice cream scoop guarantees every pancake is uniform in size, ensuring even cooking times across the batch.
- Wire Cooling Rack: Resting cooked pancakes on a wire rack keeps bottoms crisp. Stacking hot pancakes on a cold plate traps steam, turning bottom layers soggy instantly.
Common Fluffy Pancake Disasters & Simple Fixes
Kitchen Warning: Heat management is everything. High flame causes black exteriors with raw, gooey batter inside. Keep your burner set strictly to medium or medium-low!
  Pancakes Burning Outside but Raw Inside?
  [High Heat] -------> Burned Surface + Raw Batter
  [Fixed Heat] ------> 350°F / Medium-Low = Perfect Rise & Golden Skin
Flat, Heavy, or Gummy Interiors
Why your Fluffy Pancakes turn out flat usually comes down to three mistakes: over-mixing, dead baking powder, or skipping the batter rest.
- The Over-Mixing Trap: Over-whisking develops gluten into thick bands. Stop mixing the second the dry flour disappears. Lumps are your friends here! Small flour lumps dissolve naturally as the batter rests.
- Expired Leavening Agents: Baking powder loses potency after six months once opened. Test yours: drop half a teaspoon into warm water. If it doesn’t fizz aggressively, throw it out.
- Skipping the Rest: Let your mixed batter sit on the counter for 5 to 10 minutes. This allows the flour to hydrate fully and gives the acid-base reaction time to build initial air pockets.
Burnt Outside, Raw Inside
Raw centers in Fluffy Pancakes happen when your skillet heat is running way too high. The surface browns before heat penetrates to cook the inner starches and set the egg proteins.
- The Fix: Dial your burner back to medium-low. Allow the pan to preheat thoroughly. Test heat by sprinkling a few drops of water on the surface; they should dance and sizzle gently, not evaporate instantly into smoke. If your butter turns brown the second it hits the pan, wipe it out and lower your flame.
Tough Edges or Pale Color
Tough Fluffy Pancakes result from overworking the batter or frying in dry pans with zero grease.
- Fixing Color: Pale, paste-like color means your heat is too low or your batter lacks sugar. Sugar browns through caramelization and Maillard reactions.
- Fixing Texture: Lightly coat your skillet with oil or cooking spray before every batch. Wipe excess oil with a folded paper towel. You want a thin, glistening film, not a deep-fat frying pool.
Storage, Meal Prep & Reheating Secrets
  HOW TO FREEZE WITHOUT CLUMPING:
  Step 1: Cool pancakes completely on a wire rack.
  Step 2: Lay flat on a parchment-lined baking sheet.
  Step 3: Freeze for 2 hours (Flash Freeze).
  Step 4: Transfer frozen discs into a ziplock bag.
How to Freeze Stacks Without Clumping
Freezing Fluffy Pancakes is surprisingly simple and makes weekday mornings effortless. Never throw warm pancakes straight into a freezer bag, or they will freeze into one solid block of mush.
- Cool Completely: Allow cooked pancakes to rest on a wire rack until room temperature.
- Flash Freeze: Lay pancakes in a single layer on a parchment-lined baking sheet. Place the sheet in your freezer for two hours until the cakes are frozen solid.
- Bag & Label: Transfer individual frozen pancakes into a heavy-duty freezer bag. Squeeze out excess air. Stored this way, they stay fresh for up to three months.
Reheating Methods Ranked
Forget soggy microwave reheating whenever possible. Here is how to restore original texture:
- The Toaster (Best Overall): Pop frozen pancakes directly into your toaster on a medium setting. It re-crisps the exterior while heating the center thoroughly in under two minutes.
- The Oven (Best for Crowds): Arrange frozen pancakes in a single layer on a baking sheet. Cover tightly with foil to lock in moisture. Bake at 350°F (175°C) for 8 to 10 minutes until piping hot.
- The Microwave (Fastest, But Softest): Stack two pancakes on a microwave-safe plate. Cover with a paper towel. Microwave on high for 30 to 45 seconds. Edges will be soft, not crisp, but it works in a pinch.
Serving Suggestions, Syrups & Beverage Pairings
  +-------------------------------------------------------------------+
  |                      FLAVOR PAIRING MATRIX                        |
  +--------------------+-----------------------+----------------------+
  | Profile            | Toppings              | Recommended Drink    |
  +--------------------+-----------------------+----------------------+
  | Classic American   | Maple Syrup + Butter  | Dark Roast Coffee    |
  | Berry Delight      | Blueberry Compote     | Earl Grey Tea        |
  | Decadent Dessert   | Nutella + Bananas     | Cold Brew / Espresso |
  | Savory-Sweet       | Crisp Bacon + Syrup   | Mimosa or OJ         |
  +--------------------+-----------------------+----------------------+
Classic & Gourmet Toppings
Classic toppings for Fluffy Pancakes start with pure Grade A maple syrup and salted cultured butter. But why stop there when you can elevate your breakfast game?
- Compound Butters: Whip softened butter with cinnamon, honey, and a dash of sea salt. Or blend in fresh rasberries for a vibrant pink berry butter.
- Warm Fruit Compotes: Simmer fresh blueberries, strawberries, or sliced peaches with a squeeze of lemon juice and a teaspoon of sugar for five minutes until juices bubble into a syrup.
- Decadent Drizzles: Drizzle warmed Nutella, peanut butter, or salted caramel sauce over your stack. Top with toasted pecans or sliced bananas for texture contrast.
Perfect Drink Pairings
Pair your Fluffy Pancakes with drinks that balance their rich, sweet flavor profile:
- Coffee: Dark, bold roast coffees cut through sweet maple syrup brilliantly. Cold brew with a splash of oat milk offers a smooth counterpoint.
- Tea: Hot Earl Grey or English Breakfast tea provides subtle astringency that cleanses the palate between rich bites.
- Juices & Cocktails: Freshly squeezed orange juice or tart grapefruit juice provides refreshing acidity. For weekend brunches, a crisp Mimosa or a spicy Bloody Mary rounds out the feast.
Step-by-Step Culinary Walkthrough
Master the art of Fluffy Pancakes with this detailed walk-through before firing up your stove.
Start by making your sour milk. Measure your regular milk into a glass measuring cup, pour in two tablespoons of white vinegar, give it a quick stir, and let it sit. Over five minutes, you will see small curds form along the glass. That is your cue that the acid is ready to react with your leaveners.
MIX DRY ---> ADD LIQUID ---> WHISK GENTLY (LUMPS ARE GOOD!) ---> REST 5 MINS
Next, whisk your dry ingredients together in a roomy bowl. Don’t just dump them in; whisking sifts the flour while spreading the baking powder, baking soda, sugar, and salt evenly. This prevents bite-sized pockets of bitter baking soda later.
In your soured milk cup, whisk in your single egg and cooled melted butter. Make sure your butter isn’t scalding hot, or it will scramble the egg on contact!
Pour your liquid mix into the dry ingredients. Grab a whisk or spatula and stir gently. Stop mixing as soon as the flour streaks vanish. You should see a thick, bumpy batter full of small lumps. Let the batter rest undisturbed for five minutes. Look closely—you will see tiny air bubbles starting to form on top as the chemical magic happens.
Heat your pan over medium heat. Lightly coat the surface with cooking spray or a dab of butter wiped clean with paper towel. Pour one-quarter cup portions of batter per pancake.
  COOKING CUES TO WATCH FOR:
  1. Bubbles form on top surface.
  2. Bubbles pop and leave tiny open holes.
  3. Edges look dry, set, and matte (not wet).
  4. Slide spatula under --> Flip gently in one swift motion!
Watch your pan closely. As heat penetrates from below, steam and gas push up, raising the pancake. Tiny bubbles will surface. Wait until those bubbles pop and leave open holes, while the edges turn dry and matte. Slide your spatula under, flick your wrist, and flip gently! Cook for another 1 to 2 minutes until the underside matches that golden hue. Transfer to a rack and serve hot!