
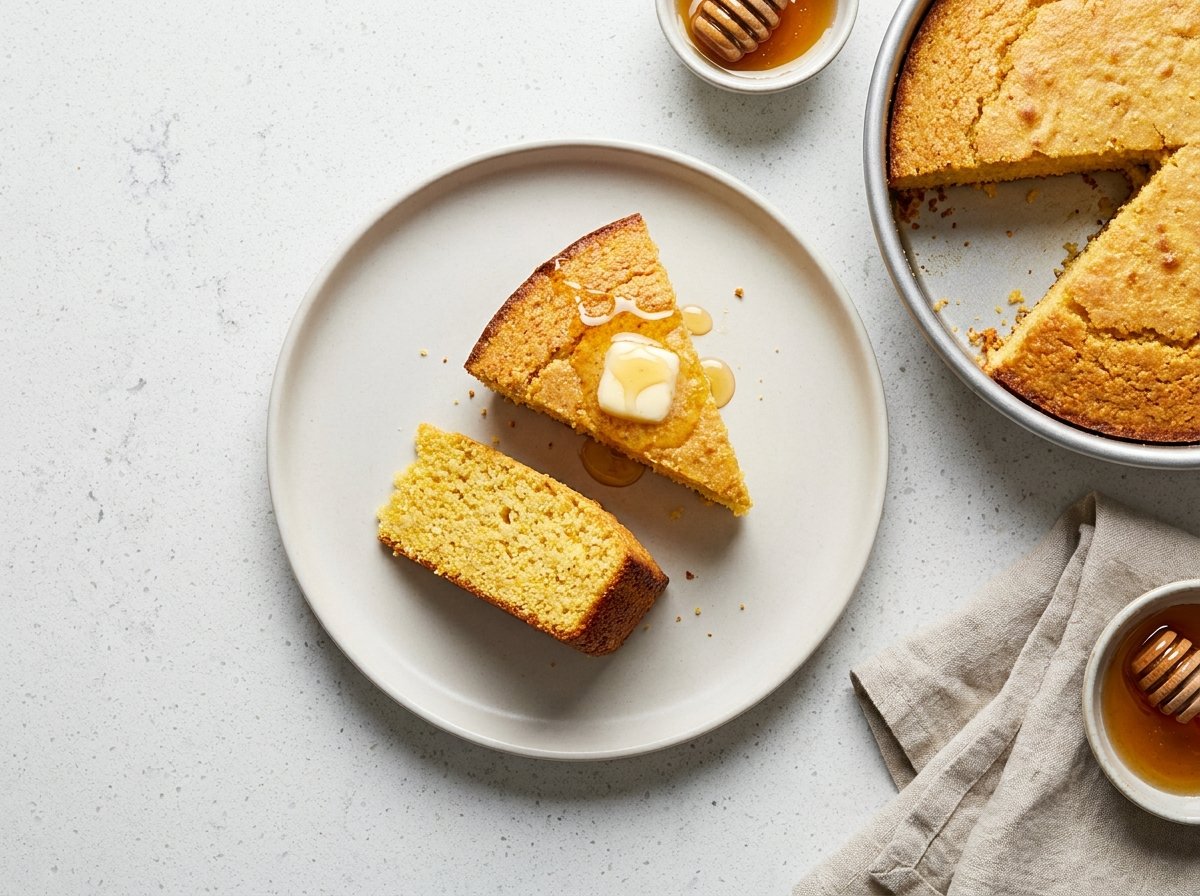
Golden Sweet Cornbread is the absolute ultimate side dish when you want something warm, buttery, and incredibly comforting on your dinner table. There is something truly magical about pulling a piping-hot batch out of the oven. The top turns a gorgeous shade of yellow, the edges get just crisp enough, and the inside stays tender without turning into a pile of dry crumbs. If you have ever been served a dry slice of cornbread that choked you up unless you smothered it in half a tub of butter, throw those memories right out the window.
This recipe balances old-school home cooking with a quick, modern technique. It comes together in just a single bowl, takes less than ten minutes of hands-on work, and bakes into a soft, cake-like square or wedge every single time.
The Story & Flavor Profile: Why Sweet Cornbread Wins Hearts
Cornbread has a rich, fascinating lineage across North American kitchens. Traditionally, old-fashioned Southern cornbread relies heavily on white cornmeal, bacon drippings, zero sugar, and buttermilk baked in a scorching-hot skillet. It is savory, dense, and meant specifically to soak up smoky potlikker from greens or hearty stews. On the flip side, Northern-style versions leaned toward yellow cornmeal and introduced sugar and wheat flour to produce a tender, sweet crumb.
This recipe bridges the absolute best of both worlds. We keep the classic crisp edges from a hot pan while embracing a sweet, moist crumb that tastes delicious all on its own.
The Flavor Profile Breakdown
- The Sweetness: Using ⅔ cup of white sugar provides a pleasant, rich sweetness without turning the bread into a full-blown dessert. It enhances the natural, earthy corn flavors without overwhelming them.
- The Texture: Equal parts yellow cornmeal and all-purpose flour create the perfect texture. The cornmeal provides that signature toothsome crunch, while the wheat flour supplies enough gluten structure to keep every slice held neatly together.
- The Aroma: As this bakes, your entire house will fill with the rich scent of warm corn, toasted sugar, and melting fat.
Ingredient Science: Why This Recipe Works Perfectly
Every ingredient in this recipe serves a specific chemical purpose in your oven. Understanding how these basic kitchen staples interact helps you bake with absolute confidence.
+---------------------+---------------------------------------------------------+
| Ingredient          | Primary Purpose & Culinary Science                      |
+---------------------+---------------------------------------------------------+
| Yellow Cornmeal     | Provides crunch, vibrant color, and sweet corn flavor.  |
| All-Purpose Flour   | Supplies gluten to structure the crumb and prevent crumble. |
| Granulated Sugar    | Sweetens, retains moisture, and caramelizes edges.      |
| Baking Powder       | Provides rapid chemical rise for a light, airy loaf.   |
| Salt                | Enhances natural corn sweetness and balances flavors.   |
| Milk (Whole or 2%)  | Hydrates starches and dissolves dry ingredients.        |
| Vegetable Oil       | Coats flour proteins to yield a silky, soft texture.    |
| Egg                 | Emulsifies fat and water while setting the structure.   |
+---------------------+---------------------------------------------------------+
Yellow Cornmeal
Yellow cornmeal gives this dish its sunny hue and distinct texture. Using fine or medium-grain yellow cornmeal delivers an authentic taste and bright look. Coarse cornmeal can work, but it tends to leave a gritty texture unless given extra time to hydrate in the wet mix.
All-Purpose Flour
Cornmeal on its own contains zero gluten. If you bake with 100% cornmeal, your bread will crumble into a mess the instant your knife cuts into it. Blending in standard all-purpose flour adds just enough structure to keep slices neat while keeping the middle nice and soft.
Granulated White Sugar
Sugar does far more than just sweeten the loaf. Sugar is a hygroscopic ingredient, meaning it attracts and retains moisture long after the dish cools down. It also caramelizes against the hot sides of the baking pan, creating those coveted sweet, golden edges.
Baking Powder
We use a generous 3 ½ teaspoons of baking powder here. Because cornmeal is heavy, it needs a serious push to lift up in the oven. Baking powder reacts once when mixed with wet ingredients, and again when heated, producing carbon dioxide bubbles that trap air into the batter for a light, fluffy rise.
Salt
Never skip the salt in sweet baked goods! A single teaspoon of salt cuts through the sugar, sharpens the corn aroma, and keeps the overall flavor balanced instead of sickly sweet.
Milk
Milk hydrates the cornmeal grains and dissolves the sugar crystals. Whole milk adds a nice touch of dairy fat that keeps the crumb tender, but 2% or your favorite plant-based milk work wonderfully too.
Vegetable Oil
While butter tastes delicious, 100% butter can sometimes dry out baked goods because of its water content. Vegetable oil remains liquid at room temperature, ensuring your bread stays incredibly moist even two or three days after baking.
Egg
A single large egg acts as our binder and emulsifier. The lecithin in the yolk binds the oil and milk together into a smooth batter, while the egg white proteins set in the heat to give your slice vertical lift.
Master Kitchen Equipment & Setup
You do not need high-end culinary gear to pull off a batch of fresh, delicious corn slices. However, picking the right tools can take your crust from good to extraordinary.
1. The Baking Vessel: Cast Iron vs. Cake Pan vs. Glass
- 9-Inch Round Cake Pan: This is the standard reliable choice. It heats evenly, yields soft sides, and creates a uniform shape that cuts easily into uniform wedges.
- Cast Iron Skillet (8 or 9-inch): The gold standard for crispy edges! Pre-heating a cast-iron skillet with a tablespoon of oil or butter before dumping in your batter creates a sizzling, fried bottom crust that takes flavor to a whole new level.
- 8×8-Inch Square Glass Baking Dish: Great if you prefer square slices. Keep in mind that glass takes longer to heat up than metal, so your total baking time might increase by two to three minutes.
2. Bowl and Whisk
Keep it simple. You only need one large bowl and a sturdy hand whisk. Skip the electric hand mixer or stand mixer entirely! High-speed mixing beats air into the gluten, turning what should be a tender pan of Golden Sweet Cornbread into a tough, rubbery loaf.
Essential Substitutions & Flavor Variations
Fell short on an ingredient? Want to tweak the flavor profile to match dinner? Here is how to swap things out without ruining your bake.
Dietary Adjustments
- Gluten-Free Version: Swap the all-purpose flour for an equal amount of 1:1 gluten-free baking flour (preferably one containing xanthan gum). Ensure your cornmeal is certified gluten-free to avoid cross-contamination.
- Dairy-Free Version: Replace the whole milk with unsweetened almond milk, oat milk, or soy milk. The oil in the main batter is already dairy-free!
- Vegan Option: Use plant-based milk and replace the single egg with a flax egg (1 tablespoon flaxseed meal mixed with 3 tablespoons warm water, left to sit for 5 minutes).
Fun Flavor Mix-Ins
Once your main batter comes together, you can fold in up to 1 cup of delicious extras before pouring it into your pan:
+-----------------------+-------------------------------------------------------+
| Variation Name        | Mix-in Additions                                      |
+-----------------------+-------------------------------------------------------+
| Jalapeño Cheddar      | 1 cup shredded sharp cheddar + 2 diced jalapeños      |
| Sweet Corn Burst      | 1 cup drained canned sweet corn or fresh corn kernels  |
| Bacon & Honey         | ½ cup cooked crumbled bacon + 2 tbsp honey in batter  |
| Blueberry Sweet Twist | 1 cup fresh blueberries tossed light in 1 tsp flour   |
+-----------------------+-------------------------------------------------------+
Common Kitchen Mistakes & Quick Fixes
Even straightforward recipes can hit a bump if basic baking rules are ignored. Here is how to avoid common kitchen traps.
Kitchen Warning: Watch the oven timer closely toward the end of your bake! Over-baking by even three minutes can turn a soft, moist slice into a dry block.
1. Why Is My Bread Dry and Crumbly?
- The Cause: You likely scooped your flour directly out of the bag with a measuring cup, packing down far too much flour. Over-baking can also bake out all the moisture.
- The Fix: Lightly spoon your flour into the measuring cup and level it off with a butter knife. Check for doneness right around the 20-minute mark.
2. Why Didn’t It Rise Properly?
- The Cause: Your baking powder might be expired! Leavening agents lose their punch after sitting in the pantry for six months.
- The Fix: Test your baking powder before starting. Drop half a teaspoon into a small cup of warm water. If it fizzes immediately, you are good to go. If not, toss it out and buy a fresh jar.
3. Why Did It Stick to the Bottom of the Pan?
- The Cause: Under-greasing the pan or removing the slice while it was still piping hot.
- The Fix: Grease your pan thoroughly with butter or non-stick spray. Let the baked pan rest on a wire rack for at least 10 minutes before slicing so the structure sets properly.
Storage, Meal Prep & Reheating Secrets
A fresh batch of homemade cornbread is a fantastic option for meal prep because it stores and reheats surprisingly well.
Room Temperature Storage
Keep leftover pieces wrapped tightly in aluminum foil or stored inside an airtight container on your kitchen counter. It stays soft and fresh at room temperature for up to three days. Avoid putting it in the fridge unless your kitchen is extremely warm, as cold temperatures cause starchy goods to go stale faster.
Freezing Slices for Later
- Slice the cooled bread into individual wedges or squares.
- Wrap each slice tightly in plastic wrap, then place all wrapped slices inside a heavy-duty freezer zip-top bag.
- Freeze for up to three months.
- When hunger strikes, pull out a slice and thaw it on the counter for 20 minutes, or warm it directly from frozen in your microwave for 30 seconds.
Reheating to Restore Freshness
- Oven/Toaster Oven Method: Wrap your slice loosely in aluminum foil and warm it up at 350°F (175°C) for 8 to 10 minutes. This restores that soft, oven-fresh texture without drying it out.
- Skillet Crisping (Best Flavor!): Melt half a teaspoon of butter in a skillet over medium heat. Place a slice cut-side down and toast for 2 minutes until hot and sizzling.
Perfect Pairings: What to Serve Alongside
While a piece of warm cornbread tastes heavenly all on its own, it shines brightest when paired with savory mains and rich spreads.
+--------------------------+----------------------------------------------------+
| Course / Meal Type       | Suggested Pairing                                  |
+--------------------------+----------------------------------------------------+
| Hearty Soups & Stews     | Smoky Beef Chili, Classic Potato Soup, Gumbo       |
| Southern Barbecue        | Pulled Pork, Smoked Beef Brisket, BBQ Baby Back Ribs|
| Country Comfort Dinners  | Buttermilk Fried Chicken, Braised Greens, Pot Roast|
| Sweet Breakfast/Brunch   | Whipped Honey Butter, Cinnamon Maple Syrup         |
+--------------------------+----------------------------------------------------+
Delicious Compound Butters to Try
- Whipped Honey Butter: Whip ½ cup softened unsalted butter with 2 tablespoons honey and a tiny pinch of sea salt until light and fluffy.
- Maple Jalapeño Butter: Blend ½ cup softened butter with 1 tablespoon pure maple syrup and 1 teaspoon finely minced fresh jalapeño.
Frequently Asked Questions
Can I make this batter ahead of time?
It is best to bake the batter right after mixing. Once wet and dry ingredients combine, the baking powder activates immediately. Letting the batter sit on the counter for hours will result in a flatter rise.
Can I use buttermilk instead of regular milk?
Yes! Buttermilk adds a subtle, pleasant tanginess. If using buttermilk, consider adding ¼ teaspoon of baking soda to help balance the extra acidity.
Can I make muffins out of this recipe?
Absolutly! Line a 12-cup standard muffin tin with paper liners or grease thoroughly. Divide the batter evenly into the cups and bake at 400°F (200°C) for 15 to 18 minutes until golden brown on top.
Step-by-Step Cooking Walkthrough
Before you jump to the recipe card below, let’s walk through the actual baking process so you get perfect results on your very first try.
Step 1: Prep Your Oven and Pan
Set your oven to 400°F (200°C) right out of the gate so it has plenty of time to reach temperature. Take your 9-inch round pan and grease every inch of the bottom and sides thoroughly using non-stick cooking spray or soft butter.
+-------------------------------------------------------------------------------+
| PRO-TIP: PRE-HEAT YOUR CAST IRON SKILLET                                      |
| If using cast iron, add 1 tablespoon of butter or oil to your skillet and     |
| slide it into the preheating oven for 5 minutes. Pour your batter directly   |
| into the sizzling pan for an extra-crispy outer crust!                        |
+-------------------------------------------------------------------------------+
Step 2: Whisk the Dry Ingredients Together
Grab a large mixing bowl. Measure out your all-purpose flour, yellow cornmeal, granulated sugar, baking powder, and salt. Whisk everything for 30 seconds until it forms a uniform powder without any visible streaks of yellow cornmeal or white sugar.
      [ Dry Ingredients Bowl ]
  (Flour + Cornmeal + Sugar + Leavening)
                 │
                 ▼
       Whisk until fully blended
Step 3: Combine with the Wet Ingredients
Pour your milk, vegetable oil, and cracked egg right into the bowl with your dry ingredients. Whisk gently, bringing the dry mixture into the center until a smooth batter forms. Keep a light touch here! Stop whisking the instant the large flour pockets disappear.
      [ Dry Ingredients Bowl ]
                 │
                 ├─► Add Milk (1 cup)
                 ├─► Add Oil (⅓ cup)
                 └─► Add Egg (1 large)
                 │
                 ▼
      Whisk gently until just combined
Step 4: Pour and Bake
Scrape every bit of batter into your greased baking dish using a rubber spatula. Smooth the top lightly so it bakes into an even layer. Slide your pan onto the center rack of your preheated 400°F oven. Bake for 20 to 25 minutes.
  [ Smooth Batter in Greased 9" Pan ]
                 │
                 ▼
  [ Bake at 400°F (200°C) for 20-25 mins ]
                 │
                 ▼
  [ Test center with a wooden toothpick ] ──► (Clean? Done!)
Check your bread around the 20-minute mark. Insert a toothpick right into the center of your slice. If it comes out clean or with just a few dry crumbs, your bread is done. If wet batter clings to the toothpick, give it another 2 to 4 minutes.
Summary of Key Rules for Success
- Do Not Over-Mix: Whisk just until the dry bits disappear to keep the texture soft and fluffy.
- Accurate Measuring: Spoon and level your flour so the batter retains its liquid balance.
- Grease Thoroughly: Don’t skimp on greasing your baking pan to prevent sticking.
- Watch the Clock: Pull the pan out the moment a toothpick inserted in the center comes out clean.
Now that you know the science, techniques, and secrets, it is time to heat up your oven and get baking!